Laboratory 6
Calcolo numerico per la generazione di immagini fotorealistiche
Maurizio Tomasi maurizio.tomasi@unimi.it
Code to implement
New types
Today we will implement three very simple types:
- The
Raytype represents a geometric light ray; - The
Cameratype represents the observer/camera; - The
ImageTracertype sends rays from the observer to the screen.
- The
The
Raytype must be very efficient, so it is better if it is a value type likeColor,Vec, etc. (see lesson 02b).The
CameraandImageTracertypes are not critical, and do not need to be particularly optimized.As usual, you can refer to the pytracer repository for a Python implementation (but do not implement the tests in the way used there!).
The Ray class
It must contain the following fields:
origin: object of typePoint(origin of the ray);dir: object of typeVec(direction of the ray);tmin: floating-point number (minimum distance);tmax: floating-point number (maximum distance);depth: integer.
You can make the last three fields have default values of
tmin = 1e-5,tmax = +∞,depth = 0.Define an
atmethod that calculates a point along the ray for a given t, and anis_closemethod that checks if two rays have similaroriginanddir.
Implementation of Ray
from math import inf

@dataclass
class Ray:
    origin: Point = Point()
    dir: Vec = Vec()
    tmin: float = 1e-5
    tmax: float = inf
    depth: int = 0

    def is_close(self, other: Ray, epsilon=1e-5) -> bool:
        return (self.origin.is_close(other.origin, epsilon=epsilon) and
                self.dir.is_close(other.dir, epsilon=epsilon))

    def at(self, t: float) -> Point:
        return self.origin + self.dir * t
Tests for Ray
class TestRays(unittest.TestCase):
    def test_is_close(self):
        ray1 = Ray(origin=Point(1.0, 2.0, 3.0), dir=Vec(5.0, 4.0, -1.0))
        ray2 = Ray(origin=Point(1.0, 2.0, 3.0), dir=Vec(5.0, 4.0, -1.0))
        ray3 = Ray(origin=Point(5.0, 1.0, 4.0), dir=Vec(3.0, 9.0, 4.0))

        assert ray1.is_close(ray2)
        assert not ray1.is_close(ray3)

    def test_at(self):
        ray = Ray(origin=Point(1.0, 2.0, 4.0), dir=Vec(4.0, 2.0, 1.0))
        assert ray.at(0.0).is_close(ray.origin)
        assert ray.at(1.0).is_close(Point(5.0, 4.0, 5.0))
        assert ray.at(2.0).is_close(Point(9.0, 6.0, 6.0))
The Observer
We want to implement two kinds of projections in our code:
- Orthogonal projection
- Perspective projection
This is a perfect opportunity to implement polymorphism: the ability to use a common interface (
Camera) for different underlying behaviors (OrthogonalCamera,PerspectiveCamera).
Example
The simplest (but perhaps unexpected!) example of polymorphism is overloading:
The
printfunction is overloaded to handle different argument types.The decision of which call to use is made by the compiler at compile time.
Projections and Polymorphism
Is overloading useful for orthogonal and perspective projections?
Which type should be assigned to the variable
cam?OrthogonalCameraorPerspectiveCamera?
Dynamic Polymorphism (1/2)
OOP allows us to avoid this complexity by introducing a
third type in addition to OrthogonalCamera
or PerspectiveCamera, as shown in this C++ code:
struct Camera { virtual void fire_ray(...) = 0; };
struct OrthogonalCamera : public Camera { void fire_ray(...) override; };
struct PerspectiveCamera : public Camera { void fire_ray(...) override; };

int main() {
    std::string kind_of_camera = input_camera();
    Camera * camera = (kind_of_camera == "orthogonal") ?
        new OrthogonalCamera() : new PerspectiveCamera();
    // ...
}
Dynamic Polymorphism (2/2)
But OOP is not the only way to achieve dynamic polymorphism, because you can also use procedural polymorphism. Here is an example in C++:
using FireRayProc = void(Type1 arg1, Type2 arg2);

void fire_ray_orthogonal(Type1 arg1, Type2 arg2);
void fire_ray_perspective(Type1 arg1, Type2 arg2);

void fire_all_rays(FireRayProc fire_ray) {
    // Use `fire_ray(arg1, arg2)` whenever appropriate
}

int main() {
    std::string kind_of_camera = input_camera();
    FireRayProc * proc = (kind_of_camera == "orthogonal") ?
        &fire_ray_orthogonal : &fire_ray_perspective;

    // Dynamic polymorphic call!
    fire_all_rays(proc);
}
Types of polymorphism
In summary, there are two types of polymorphism:
Static polymorphism (i.e., at compile time): this is the case of overloading.
Dynamic polymorphism: this is the case of class hierarchies.
Today we will need dynamic polymorphism for cameras. You can implement either using OOP constructs (suitable for languages like Java and Kotlin) or using procedural programming.
Interfaces and traits
A very common case is when the base class serves only as a common interface for different derived types.
Some modern languages provide more flexible mechanisms called interfaces (Go, C#) or traits (Rust). An interface is the analogue of a class where all methods are empty; here is an example in Go:
The *Camera classes
If you want to use an OOP approach,
Camerawill be the type from which the new typesOrthogonalCameraandPerspectiveCameraare derived.The idea is precisely to implement the type hierarchy we have seen:
![]()
Use whatever your language allows to implement polymorphism: class hierarchy in C#/D/Java/Kotlin, traits in Rust, etc.

Tweet by Freya Holmér, cited in Translating a Fortran F-16 Simulator to Unity3D (vazgriz)
P = (-d, 0, 0),\ \vec d = (d, 0, 0),\ \vec u = (0, 0, 1), \vec r = (0, -a, 0).
Orienting Camera
The only adjustable parameters of
Cameraared(screen-observer distance) anda(image aspect ratio).The reference system of the previous slide is rigid: this makes implementation straightforward, as there is no need to manually manage the basis vectors \vec d, \vec u and \vec v.
To orient a
Camera, we can use theTransformationtype that we implemented last week.It must be possible to invoke a
fire_raymethod on objects of type*Camerathat accepts a coordinate (u, v) as input and returns aRayobject.
Transformations
If we associate a transformation T to the observer, we could apply it to the points/vectors that define the observer, namely P, \vec d, \vec u and \vec r, and move/orient the observer.
However, this complicates the calculation of ray directions that pass through the screen in the
fire_rayfunction!It is better to create the rays in the original reference system, and then apply the transformation to the ray: it is simpler to code and the impact on time is negligible.
Therefore, we need to implement the
Transformation * Rayoperator, which will apply the transformation T to both O (origin) and \vec d (ray direction).
Transforming Ray
This is the application of a transformation to a ray; you could alternatively redefine the
*operator in theTransform * Raycase:It is not necessary to transform
tminandtmax.
Test for transform
def test_transform():
    ray = Ray(origin=Point(1.0, 2.0, 3.0), dir=Vec(6.0, 5.0, 4.0))
    transformation = translation(Vec(10.0, 11.0, 12.0)) * rotation_x(90.0)
    transformed = ray.transform(transformation)

    assert transformed.origin.is_close(Point(11.0, 8.0, 14.0))
    assert transformed.dir.is_close(Vec(6.0, -4.0, 5.0))
Types of Projections

Screen Coordinates
To avoid confusion between spatial coordinates (x, y, z) and 2D screen coordinates, we will use the letters (u, v) to indicate screen points:
![]()
For example, a ray fired towards (u, v) = (0, 1) must pass through the point P + \vec d - \vec r + \vec u.

OrthogonalCamera
To construct it, you need the
aspect_ratioparameter (a floating point number, or a rational like16//9in Julia) andtransformation.This is a possible implementation in Python:
class OrthogonalCamera(Camera):
    def __init__(self, aspect_ratio=1.0, transformation=Transformation()):
        self.aspect_ratio = aspect_ratio
        self.transformation = transformation

    def fire_ray(self, u: float, v: float) -> Ray:
        origin = Point(-1.0, (1.0 - 2 * u) * self.aspect_ratio, 2 * v - 1)
        direction = VEC_X
        return Ray(origin=origin, dir=direction, tmin=1.0e-5).transform(self.transformation)
Tests for the Observer
It is important to verify that the four corners of the image are projected correctly. We also choose an aspect ratio different from 1.
For
OrthogonalCamerawe verify that the rays are parallel to each other: we do this by calculating their cross product and verifying that it coincides with the null vector.(For
PerspectiveCamerawe will instead verify that all rays have the same origin).
Tests for OrthogonalCamera
def test_orthogonal_camera(self):
    cam = OrthogonalCamera(aspect_ratio=2.0)

    ray1 = cam.fire_ray(0.0, 0.0)
    ray2 = cam.fire_ray(1.0, 0.0)
    ray3 = cam.fire_ray(0.0, 1.0)
    ray4 = cam.fire_ray(1.0, 1.0)

    # Verify that the rays are parallel by verifying that cross-products vanish
    assert are_close(0.0, ray1.dir.cross(ray2.dir).squared_norm())
    assert are_close(0.0, ray1.dir.cross(ray3.dir).squared_norm())
    assert are_close(0.0, ray1.dir.cross(ray4.dir).squared_norm())

    # Verify that the ray hitting the corners have the right coordinates
    assert ray1.at(1.0).is_close(Point(0.0, 2.0, -1.0))
    assert ray2.at(1.0).is_close(Point(0.0, -2.0, -1.0))
    assert ray3.at(1.0).is_close(Point(0.0, 2.0, 1.0))
    assert ray4.at(1.0).is_close(Point(0.0, -2.0, 1.0))
Tests for the observer
Let’s verify the correctness of transformations when applied to cameras:
A similar testing strategy applies to the
PerspectiveCamera.
PerspectiveCamera
Apart from the aspect ratio and the transformation, perspective projections require the distance d between the screen and the observer.
This is a possible implementation in Python:
class PerspectiveCamera(Camera):
    def __init__(self, distance=1.0, aspect_ratio=1.0, transformation=Transformation()):
        self.distance = distance
        self.aspect_ratio = aspect_ratio
        self.transformation = transformation

    def fire_ray(self, u: float, v: float) -> Ray:
        origin = Point(-self.distance, 0.0, 0.0)
        direction = Vec(self.distance, (1.0 - 2 * u) * self.aspect_ratio, 2 * v - 1)
        return Ray(origin=origin, dir=direction, tmin=1.0e-5).transform(self.transformation)
Tests for PerspectiveCamera
def test_perspective_camera(self):
    cam = PerspectiveCamera(screen_distance=1.0, aspect_ratio=2.0)

    ray1 = cam.fire_ray(0.0, 0.0)
    ray2 = cam.fire_ray(1.0, 0.0)
    ray3 = cam.fire_ray(0.0, 1.0)
    ray4 = cam.fire_ray(1.0, 1.0)

    # Verify that all the rays depart from the same point
    assert ray1.origin.is_close(ray2.origin)
    assert ray1.origin.is_close(ray3.origin)
    assert ray1.origin.is_close(ray4.origin)

    # Verify that the ray hitting the corners have the right coordinates
    assert ray1.at(1.0).is_close(Point(0.0, 2.0, -1.0))
    assert ray2.at(1.0).is_close(Point(0.0, -2.0, -1.0))
    assert ray3.at(1.0).is_close(Point(0.0, 2.0, 1.0))
    assert ray4.at(1.0).is_close(Point(0.0, -2.0, 1.0))
ImageTracer
We are now ready for the final component: a functionality that links the
HdrImagetype to one of the types derived fromCamera.The
ImageTracertype manages the mapping between pixel indices inHdrImageand the(u, v)coordinates ofCamera.For convenience, we define two functions associated with
ImageTracer:- A
fire_rayfunction that sends a ray towards a specified pixel; - A
fire_all_raysfunction that iterates over all the pixels of the image callingfire_ray.
- A
fire_ray
The
fire_rayfunction must send a ray towards a pixel in the image.Apart from converting the coordinates from the
(u, v)space to the pixel space, there is the problem of the pixel’s surface.A pixel is not in fact a point, because it has a certain area: through which point within the pixel area should the ray pass?
For the moment we will make the ray pass through the center of the pixel, but let’s make it possible to specify a relative position through two coordinates
(u_pixel, v_pixel), similar to the(u, v)coordinates but referring to the pixel surface instead of the image.
fire_all_rays
Once a ray has been “cast” towards a pixel, the
fire_all_raysfunction should calculate the solution to the rendering equation.We will implement multiple solution methods, ranging from high-fidelity, computationally expensive methods to fast, coarse implementations.
For the moment I recommend you use a procedural approach:
fire_all_raysaccepts as an argument a function that is invoked for each pixel/ray of the image and returns aColorobject.
ImageTracer in Python
class ImageTracer:
    def __init__(self, image: HdrImage, camera: Camera):
        self.image = image
        self.camera = camera

    def fire_ray(self, col: int, row: int, u_pixel=0.5, v_pixel=0.5) -> Ray:
        # There is an error in this formula, but implement it as is anyway!
        u = (col + u_pixel) / (self.image.width - 1)
        v = (row + v_pixel) / (self.image.height - 1)
        return self.camera.fire_ray(u, v)

    def fire_all_rays(self, func) -> None:
        for row in range(self.image.height):
            for col in range(self.image.width):
                ray = self.fire_ray(col, row)
                color = func(ray)
                self.image.set_pixel(col, row, color)
Tests for ImageTracer
def test_image_tracer(self):
    image = HdrImage(width=4, height=2)
    camera = PerspectiveCamera(aspect_ratio=2)
    tracer = ImageTracer(image=image, camera=camera)

    ray1 = tracer.fire_ray(0, 0, u_pixel=2.5, v_pixel=1.5)
    ray2 = tracer.fire_ray(2, 1, u_pixel=0.5, v_pixel=0.5)
    assert ray1.is_close(ray2)

    tracer.fire_all_rays(lambda ray: Color(1.0, 2.0, 3.0))
    for row in range(image.height):
        for col in range(image.width):
            assert image.get_pixel(col, row) == Color(1.0, 2.0, 3.0)
CI builds
CI builds
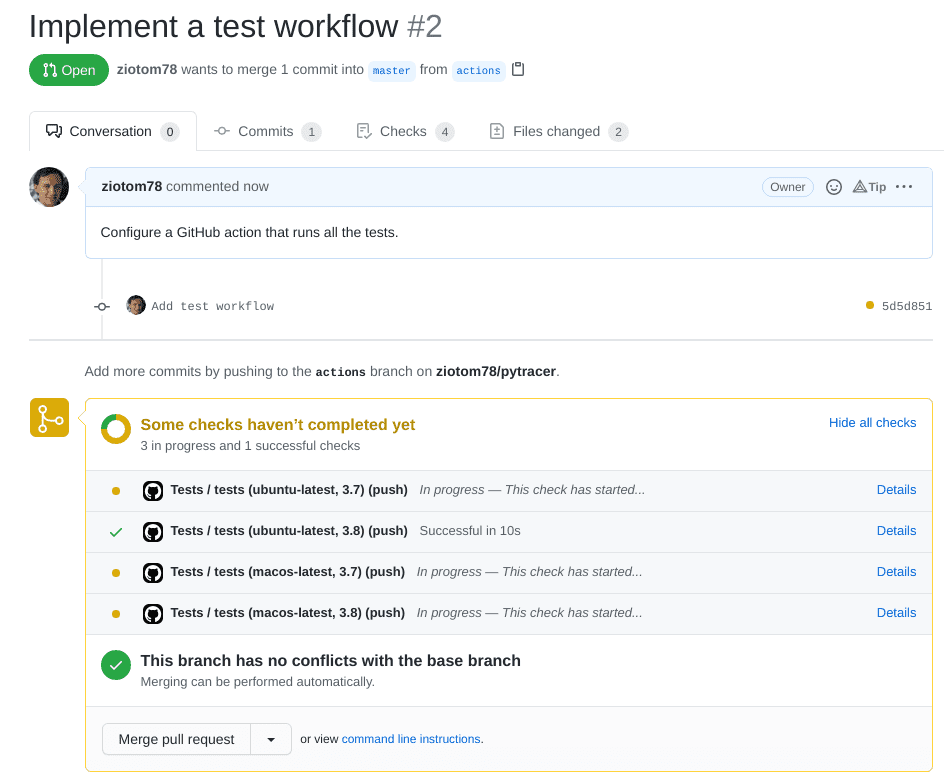
When managing pull requests, it is necessary to be sure that the change does not break the existing code.
A basic requirement is that all tests continue to pass once the pull request is merged.
GitHub allows you to automatically verify this requirement, using Continuous Integration builds (which GitHub calls GitHub actions).
Continuous Integration (CI)
It is a term that refers to a development practice in which improvements and code changes are incorporated as soon as possible into the
masterbranch.Before they can be incorporated, it is necessary to be 100% sure of their quality!
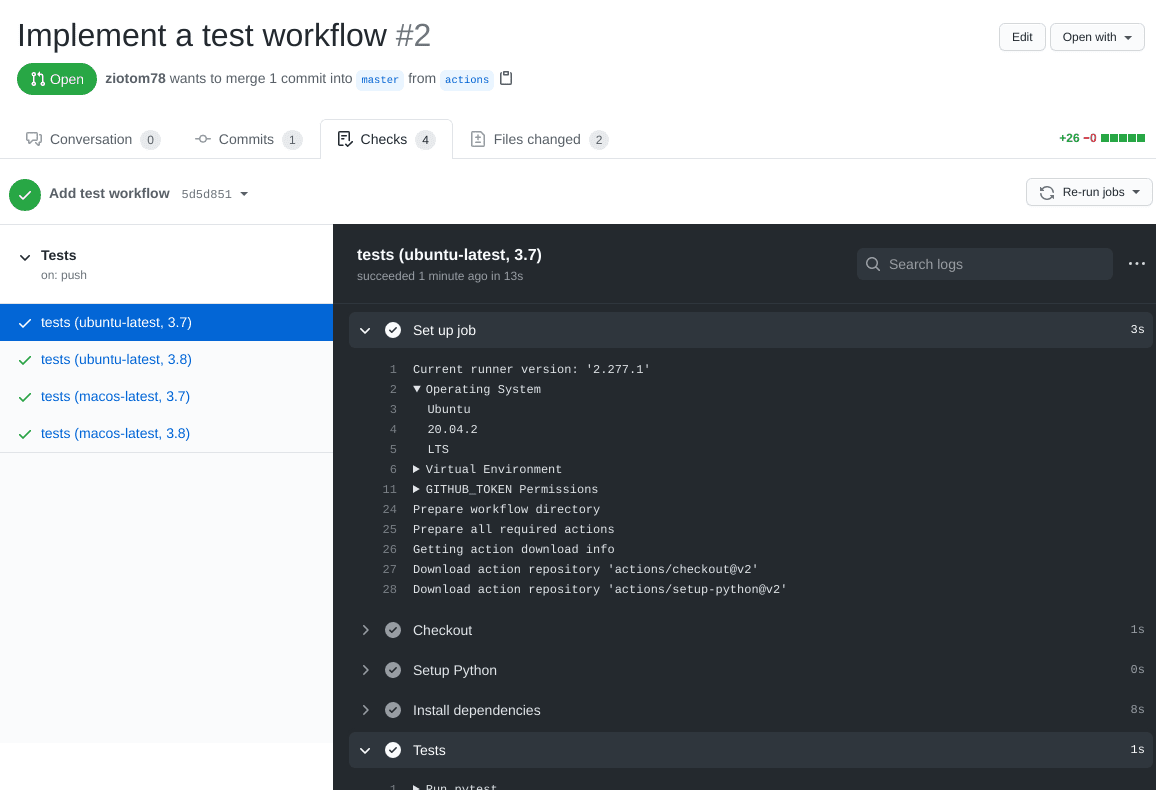
A CI build consists of creating a virtual machine on which a «clean» operating system is installed and on which the code is installed, compiled, and the tests are run.
At the end of the test execution, the virtual machine is deleted; if the CI build is run again, everything starts over.
Advantages of CI builds
They install the code on a virtual machine: it’s harder to mess things up.
The virtual machine is always created from scratch: it’s easier to discover the code’s dependencies. (Example: which version of the C++ compiler was installed? Was the
libgdlibrary installed?)You can create multiple virtual machines with different operating systems (Linux, Windows, Mac OS X…): the code is verified on each of them.
CI builds can be run automatically by GitHub every time a pull request is opened, every time a commit is made, etc.
CI builds in GitHub
A CI build can be created and executed in GitHub using GitHub Actions, a service that includes several possibilities that go beyond simple CI builds.
To activate a CI build, you simply need to create a hidden directory
.github/workflowsin your repository, containing a text file in YAML format, which contains this information:- When to execute the action (on every pull request? on every commit?)
- Which operating system to use (Linux? Windows? which version?)
- Which additional packages to install (C++ compiler? Python?)
- How to compile the code and run the tests?
The «Marketplace»
GitHub Actions has a «marketplace» that allows you to automatically configure a CI build with a few mouse clicks, depending on the language you use.
Pre-configured actions are available for many languages and development environments.
It’s not a problem if you don’t find an action that suits your needs: it’s quite simple to create new custom actions, once you understand how to describe them.
What can be done in a CI build?
Run linters like ruff check for Python or CSA for C++.
Make the job fail if the code is not formatted properly, if you use tools like ruff format (Python), clang-format (C++), etc.
Publish your User’s manual (including docstrings!) using sites like ReadTheDocs, Sphinx, MkDocs, Jupyter Book, etc.
Generate ready-to-download executables (so the user is not forced to install a C++/Nim/Rust/… compiler)
Avoid over-complicating the workflow: free CI build time is limited!
The only requirement for this course is that you run the tests!
What to do today
What to do today
Create a branch for today’s work, which you will call
cameras.Implement these types:
Ray;Camera,OrthogonalCamera, andPerspectiveCamera;ImageTracer.
Implement all the tests. When you have finished the implementation and the tests pass successfully, close the PR.
Add a workflow to your GitHub repository that (1) downloads the code, (2) compiles it, and (3) runs the tests.
Hints for C++
Dynamic polymorphism
C++ supports both virtual functions (OOP polymorphism) or functional polymorphism
Given that it’s likely you already learned how to use
virtualmethods in C++, I suggest you try procedural polymorphism todayBut if you feel it’s better to use OOP, go on! The two approaches boil down to the same machine code, so it’s just a matter of aesthetics.
GitHub Actions
Set up a new “Action” as shown in the following video.
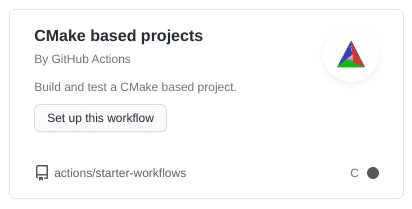
If you use CMake, use the template “CMake based projects” (ignore the fact that it seems to only support the C language):
![]()
XMake and other build systems are supported as well. LLMs are usually very good in creating/improving CI build descriptions, but be sure to understand what they propose!
Hints for C#
Dynamic polymorphism
C# is a OOP language, so it’s better to stick with virtual methods
However, C# supports interfaces, so you should definitely try them!
Remember that in C# there is the convention that interfaces begin with a capital
I. So, instead of using the nameCamera, useICamera.
GitHub Actions
Add an Action to the GitHub repository, once you have committed and executed
git push.The template is «.NET» (avoid the «.NET desktop» template, we need the one for programs that work from the command line):
![]()
Hints for Java/Kotlin
GitHub Actions
Whether you use Java or Kotlin, select «Java with Gradle»:
![]()
If you use Kotlin, Gradle will automatically download what is needed to support it.
The process will try to compile the code and run all the tests in the repository
Troubleshooting
Remember to add the files in
gradle/wrapper/to the commitIf you have problems in Kotlin due to the Gradle version, regenerate
gradlewfrom the command line like this:(Keep in mind that Gradle supports Kotlin only starting from version 5.3).
Hints for D/Nim/Rust
GitHub Actions
Rust has too many toolchains: pick one with enough stars, like rustup-toolchain-install
For D, you can use setup-dlang
For Nim, there is Setup Nim Environment
Hints for Julia
Dynamic polymorphism
Julia makes heavy use of multiple dispatch, so use it!
You should define an abstract type
Cameraand then implement the two typesOrthogonalCameraandPerspectiveCameraas a hierarchyImplement the function
fire_raytwice:function fire_ray(cam::OrthogonalCamera, …) … end function fire_ray(cam::PerspectiveCamera, …) … endWhen using multiple dispatch, you must define the type of the
camparameter, so that Julia can distinguish between the two implementation.
GitHub Actions
- The repository for standard Julia Actions is Julia Actions.
- The most useful actions are:
julia-actions/setup-julia@v2to set up the Julia compiler;julia-actions/julia-buildpkg@v1to build the package;julia-actions/julia-runtest@v1to run the tests.